Algerian greens with bulgur

022_algeriangreensbulgur

Today, I’m feeling a little under the weather. I stayed home from work and made myself a giant pot of pho broth (recipe testing underway!), napped, and wore only stretchy things. I’m mainlining echinacea tea and deciding on an indulgent chick flick for tonight… so good. I’m lucky that I can work remotely on days like this, so I even got a little done — but it didn’t take much urging from coworkers for me to get off the computer and rest.

This cold/flu, I don’t feel quite totally demolished (crossing fingers), so I’ve been able to more-or-less feed myself. That said, I’m certainly not in the mood for a meal that takes many steps or takes too long. Luckily, my repertoire of quickish, easyish meals that I still look forward to is deep… thanks, full-time job. Related: one-pan meals, ie, my favorite, farro. I have my friend Anna Ruby to thank for the tip on this one. We have very similar “food aesthetics,” so recipe recommendations from her are pure gold.

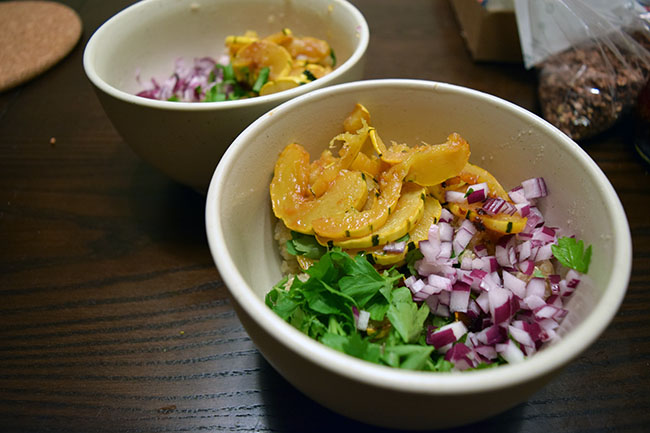
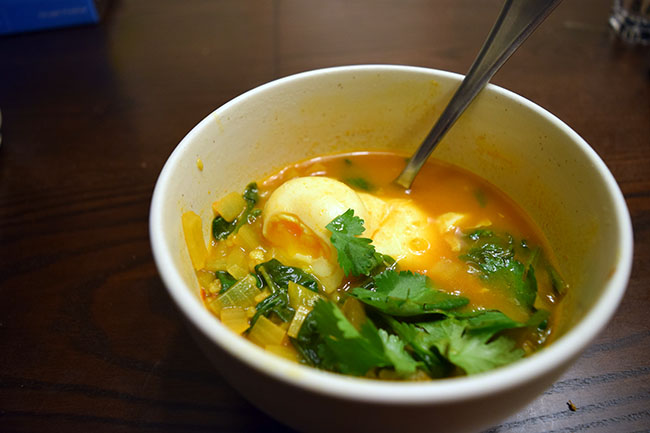
It’s an assertively spiced stew with a little cooked bulgur, greens, and tomato paste. I added a poached egg because, yum, and also I’m practicing my poaching eggs! But without it, it’s one-pan. Or, at least it is, when I take my lazy liberties with the original recipe.

Algerian Greens with Bulgur
Adapted from 64 sq ft kitchen + ARWB’s suggestions
Serves 2 as a light meal. Or, you know, one person, twice.

2 Tablespoons safflower oil
1 medium onion
3 garlic cloves
1 teaspoon cumin
1 teaspoon crushed red pepper
1 teaspoon ground coriander
1/4 tsp turmeric
1 Tablespoon tomato paste
2 cups chicken or vegetable stock (I used Better than Bouillon fakeout chicken)
2 Tablespoons bulgur
big handful of spinach
big handful of arugula
1 Tablespoon cilantro leaves
1 Tablespoon parsley leaves
salt and pepper
1 poached egg (optional)

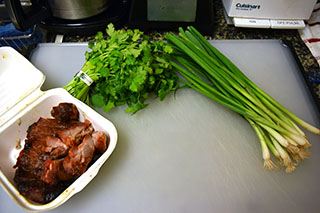
Vegetable prep: chop the onion, mince the garlic, and roughly chop cilantro and parsley. Rinse the spinach and arugula if necessary.

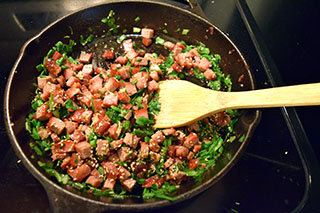
In a medium pot, heat the vegetable oil. When the oil is shimmering, add the onion, cooking for a few minutes. Then, add the garlic, cumin, crushed red pepper, coriander, and turmeric. Toast until fragrant, and then add the tomato paste and stock. Bring the mixture to a boil.

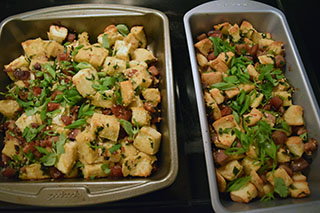
Add the bulgur to the boiling stew. When bulgur is almost done (12 minutes or so), add the greens and cover, allowing them to cook while the bulgur finishes. Season with salt and pepper to taste.

Top with herbs, and, if you want, an egg.


Butternut Squash and Celeriac Lasagna, from My New Roots

0220_giantceleriac   0220_jadeandceleriac
0220_roastedbnutsquash   0220_dishesforlasagna
0220_lasagnaprepared
0220_lasagnaplated

Also known as, the meal for six that only used part of a celery root literally the size of my head.

Celeriac, you guys. It definitely challenges me. I’m never sure how to prepare it in a moderately healthy way (<3 u cream and butter, but a little too much) that is also, you know, tasty. And I can’t figure out if it’s actually substantially better for me than potatoes. I would guess yes? But it’s definitely more ambiguous and complicated than a pile of leaves.

So, let’s get this out of the way, first. I named this dish faithfully as our source did, but I wouldn’t necessarily name it lasagna, myself. I think that’s a little bit of a loaded title that promises pasta and cheese, which, notably, are both absent. That’s not to say it’s not tasty, I just think of it more as a gratin, generously, or a vegetable casserole. And it is a nice, gratin that uses a lot of a root vegetable that’s never excited me. It’s hearty and satisfying without being too rich. I will say that it’s pretty labor-intensive. It took me a few hours of leisurely bopping around in the kitchen to pull the whole dish together.

You could prep the sauce, “béchamel,” and leafy layer completely ahead of time. You could also slice the celeriac noodles ahead of time, but I would keep them stored suspended in water to avoid browning. It’s all cooked before assembly, so the final bake is mainly to warm it through, making the final step is relatively fast.

Butternut Squash and Celeriac “Lasagna”
Adapted lightly from My New Roots

Butternut Squash Sauce
4.5 lbs (2 medium or 3 small) butternut squash
4 cloves garlic
1 Tablespoon olive/safflower/coconut oil
1 teaspoon lemon juice
salt to taste

Preheat oven to 400˚F.

Cut squash in half lengthwise and scoop out seeds. (It may be helpful to remove the base and stem before you do this.) Rub with a little oil and salt, then roast in oven until soft, about 40 minutes to an hour. Remove from oven and let cool.

Scoop out flesh from the butternut squash and blend in a food processor or high power blender with the remaining ingredients. Season to taste.

Celeriac “Noodles”
1.3 lbs celeriac or 1/3 of a skull-sized celeriac root
vegetable broth

Scrub the celeriac as best you can. Remove the bottom, gnarled portion of the celeriac. Peel generously (take off quite a bit) using a knife — a peeler might not stand up to the assertive root.

Bring the vegetable broth to a boil in a large pot.

Cut into thin sheets carefully. (You can cut the root in half before doing so to make a flat surface.)

Boil the celeriac sheets in the broth until “al dente,” edible but not mushy. This will take 3-5 minutes, depending on thickness of sheets.

Bean “Béchamel”
1 15 oz can great northern beans (or other white beans)
sprinkle of nutmeg (optional)
1 teaspoon lemon juice
1 Tablespoon olive oil
pinch salt if needed
¼ – ½ cup water

Drain and rinse the beans.  Blend all of the ingredients in a food processor or high-power blender until smooth, seasoning to taste.

You could use dried beans, of course (you want about 2 cups total, cooked), though that definitely bumps this dish into the multi-day prep category.

Leafy layer
1/2 bunch of chard

Wash and destem the chard. Slice into medium (palm-sized) pieces.

Assembly

Preheat oven to 375˚F.

In an 8″ 10″ dish, layer, a third of the celeriac, a third of the butternut squash sauce, half of the chard, and half of the bean béchamel. Salt and pepper lightly. (Remember that celeriac is slightly salty to begin with, so you won’t need as much salt as usual.) Repeat. Top with the last third of the celeriac and last third of the butternut squash sauce.

Place in the oven until hot, timing will depend on if you prepared the ingredients beforehand or not. From room temperature, this took around 20 minutes for me.

Slice and serve immediately.

Miso Roasted Delicata Squash & Quinoa Bowl

0218_squashquinoabowl

Okay, well, I think after porky stuffing with two kinds of bread and risotto (even if it has vegetables in it), we could use a real weekday food sort of post, right? I know that the ____ bowl is sort of the most basic “whole food” blog meal, but, for good reason. Grains topped with vegetables, maybe a sauce if you want to go all out? I mean, if you gave me that template to eat for the rest of my life, I’d really miss cookies, but I’d probably be fine.

There’s nothing particularly interesting about the majority of the prep for this bowl. The quinoa, I cooked normally. There’s parsley and red onions, minced, mostly because they were available in the refrigerator.

We’ve been getting a lot of delicata squash in our CSA box. One of the CSA newsletters described it as one of the more convenient winter squashes to prepare because of its thin skin and “sensible size,” which has clearly really stuck with me. Sometimes, when cutting into one, I like to yell, “What a sensibly sized squash!” for nobody’s real benefit. I’ve been roasting them with miso, which I like because it helps them caramelize (if you are not in a hurry like I was), and I think that miso’s savory nuttiness is a great pairing for slightly-sweet winter squash.

Miso Roasted Delicata Squash

2 small delicata squash, or 1 medium/large one
2-3 tablespoons olive oil
2-3 tablespoons miso paste
< 1 tablespoon mirin (optional)
salt & pepper

Preheat the oven to 375˚F.

Slice the delicata squash in half lengthwise. Use a spoon to remove the seeds. (You can roast the seeds if you want. They are similar to pumpkin seeds.) Then, slice the squash into thin (1/4 to 1/2 inch) half-moons.

In a large bowl, combine olive oil, miso paste, and mirin, if using. Whisk together with a fork until more or less combined. Sorry about the imprecise measurements, but you basically want each piece to be lightly coated in the liquid. If you are unsure, I’d start with a smaller amount of oil and miso, and if needed, add more later.

Add the squash to the bowl and toss gently to coat.

Place squash in one layer on a pan covered with parchment or silicon. (The sugar in the miso and mirin will make it a little annoying to clean off an unlined pan.) Season lightly with salt and pepper, but remember that miso paste is quite salty already. Place in preheated oven until squash is soft, and if desired, slightly caramelized, about 30 minutes.

Char Siu Stuffing


1223_csstuffingbreads   1223_csstuffingingredients
1223_csstuffingpork   1223_csstuffingbothsmall
1223_csstuffingbothbig
1223_csstuffingplated

With my sincere apologies to the vegetarians… we’ll be back to our regular, veg-friendly programming shortly.

In the spirit of Lunar New Year, which, for me, is basically another Thanksgiving (quality time with family, eating tasty things), here’s my Chinese-ish twist on stuffing. I made it two ways, with Taiwanese toast and with sliced steam buns, you know, for science. It’s savory and a little sweet, hearty, but with plenty of fresh herbs for contrast.

I’m headed home in a little bit to celebrate the Lunar New Year with my family. I’m trying to be mindful about seeing them more regularly, especially since it can be easy to be very caught up in my own world here, a few hundred miles away. I’m looking forward to cooking with my mom, chatting with my dad, and commiserating with my sister. I only wish that my car would drive itself the long way there and back!

Char Siu Stuffing

5 slices of Taiwanese toast or 2 steam buns
1 lb char siu
1 large handful of cilantro
4-6 scallions
around 5 cups of broth (low sodium if possible)
1-2 tablespoons hoisin sauce, plus more for serving
toasted sesame seeds (optional)

Preheat oven to 350˚F. Slice the bread or steam buns into small cubes. Toast in the oven until the bread is crispy on the outside but still soft on the inside. If you’ve got an extra day, you could also cut the bread and let it sit out overnight to get a little stale.

Slice the char siu into small pieces. Mince cilantro and scallions finely. Reserve a small portion of each herb for garnish later. Heat up a large pan and briefly stir fry the char siu and rest of the herbs — no need to cook the meat further, but just to help the flavors combine.

Mix the hoisin sauce into the broth and stir to dissolve. (You can add an egg to this mixture if you like your stuffing more custard-y, but I like mine a little like panzanella.)

Preheat oven to 375˚F.

Combine the bread cubes and char siu mixture in a large bowl, mixing gently to combine. Carefully pour into a lightly oiled, lined, or nonstick pan. Slowly pour in the broth and hoisin sauce mixture until everything is moistened but not totally submerged. You might need to squeeze down the mixture a little bit.

Bake for 20 to 30 minutes, until lightly browned on top. Scatter reserved herbs and sesame seeds (if using). Serve with more hoisin sauce and/or Sriracha.


A note on the breads choices — I slightly preferred the toast, as I found it was more able to soak up the broth and flavor. That said, the more robust texture of the steam buns was very satisfying!

Meyer Lemon Finishing Salt

0214_lemonsaltinhand
0214_lemonsaltinpan
0214_lemonsaltcloseup   0214_lemonsaltinjar
0214_lemonsaltonegg

Happy Valentine’s Day! I’ve never been much for this “holiday,” so I’m spending the day cleaning out my closet, making pretentious salt, and wishing I had written Fifty Shades of Grey so I could quit my day job. Also, emailing my ladyfriends, because galentine’s day, I can get behind.

That said, today is special here! Because, for possibly the first time, I’m posting something that I just made. Like, less than an hour ago. It was just too perfect —  we’ve got these cute little heart spoons that we accidentally bought, and, for the first time, I felt inspired to wear a dress to match my food (who am I). I learned how to use my camera’s self-timer for this, you guys. I don’t even want to talk about how many times I had to try to get a photo taken via self-timer on my little tripod with the jar in focus. (Who am I kidding, I do want to talk about it, and it was a lot. I’m also very self-conscious about my hands and bare arms, now.)

Meyer lemon season makes me panic a little bit, like a lot of food enthusiasts it seems, because it’s so short and I like them so much. This year, I’m getting in the preservation game. Since I’m trying to eat fewer sweets, my usual favorites of lemon curd and lemon bars are out, but we’re going full steam ahead with savory.

I’ve recently succumbed to fancy salt. No regrets. It makes a simple meal feel really special for very little effort. This took me maybe 20 minutes total and made my lunch savory, citrusy, and floral. And I felt super indulgent. One day maybe I’ll give these out in tiny jars as gifts? I need more lemons.

Meyer Lemon Finishing Salt
From Simple Bites

1/4 cup sea salt
1 small Meyer lemon (I bet non-Meyer lemons would be fine, too!)

Preheat oven to 150˚F. (Lowest my oven went was 170˚, and it seemed fine.) Scrub the lemon very carefully.

Pour out salt onto a parchment-lined baking sheet. Zest the lemon right over the salt. Massage the zest into the salt using your hands, and arrange more-or-less evenly on the pan.

Bake for 15 minutes or so, until the zest looks dried out. Break up any clumps. Allow the salt to cool, then place into your container.