My family loves eggs. When I lived at home, we would buy them in 18-packs (sometimes two of them), and occasionally in the smaller palettes that Costco offers. A fried egg on a carb vessel, your choice of rice or toast, continues to be my go-to quick meal and has been more or less since I could chew.
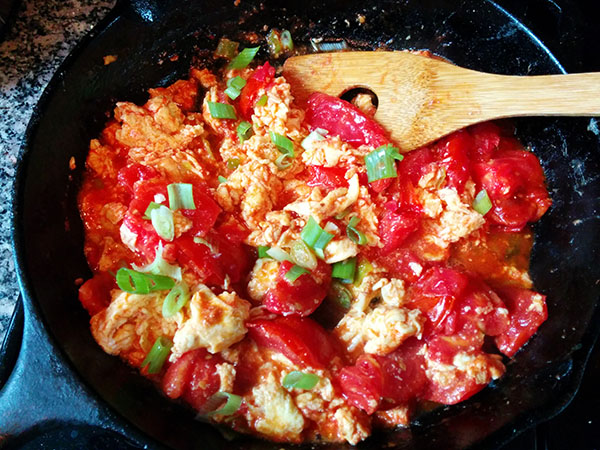
Tomato eggs is a staple of my mother’s, for good reason, because it’s easy, relatively healthy, and so good. Fluffy eggs with slightly tart tomato gravy, served on rice — I’d happily eat it every day.
Tomato Eggs (Fanqie chao dan)
3 eggs
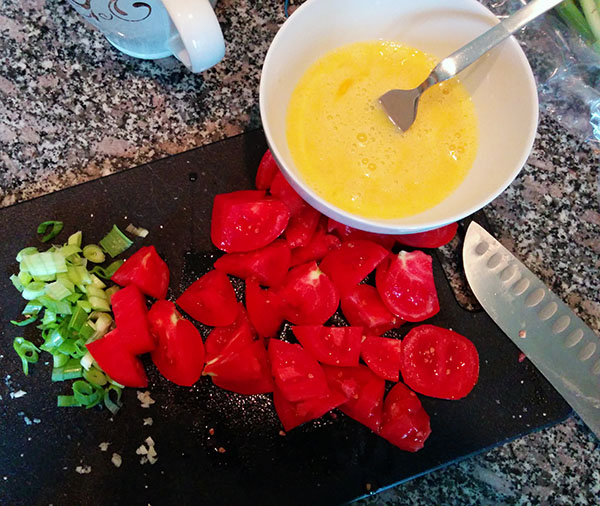
2-3 ripe tomatoes, roughly chopped
1 or 2 scallion stalks, finely chopped
1-2 teaspoons of mirin
soy sauce
salt
white pepper (optional)
a splash of milk (optional)
vegetable oil
Prep with some amazing tomatoes from the farmers’ market.
Beat eggs well (but no need for froth or peaks or anything) with a splash of milk if you have it and mirin for sweetness. Vary the amount of mirin based on taste and the sweetness of your tomatoes.
Scramble the eggs however you like ’em. I usually err slightly less done than usual, since you will be heating them up again. Set aside on a plate (or the bowl you used to beat eggs).
Heat up the pan again with some vegetable oil. Add half of the scallions and sautee briefly until fragrant. Add the tomatoes to a pan and cook until they are soft and let out juices. Season with salt, white pepper (if you like it), and soy sauce to taste.
Add eggs to the pan and mix gently, trying to keep some of the larger curds of scrambled egg. Add more seasoning if desired. Top with the rest of the scallions and serve with rice.
I am so very behind. Obviously, I have been eating. But I’ve also been doing other things, notably, launching a product at work, traveling out of the country and within the country, and being lazy and not blogging. But I have a backlog of photos and recipes and various sundries, and, well, it’s not getting any smaller.
I went to Seattle about two months ago on a work trip, but I didn’t let being hideously busy stop me from eating my heart out and hanging out with my amazing friend Kim.
Pike Place market tourist photo.
I stopped by Pike Place before I even got to my hotel. OK, technically, it was vaguely on the way to the hotel from the light rail. My rolling luggage made a racket as I walked down the cobblestone streets in search of snacks.
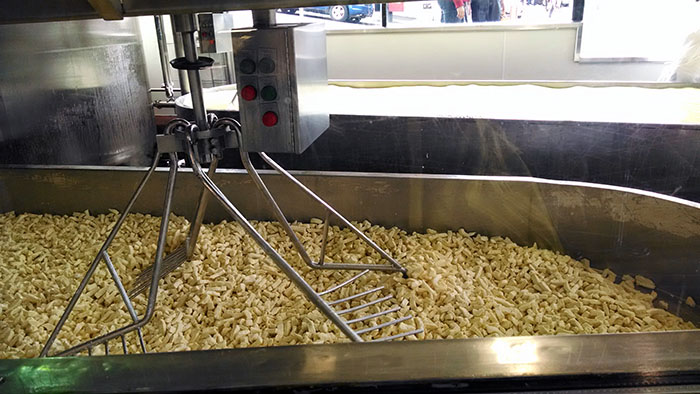
Cheese-making. What a time to be alive!
First stop was Beecher’s Handmade Cheese, which is obviously everything I want in life. Anyone who knows me has figured out that my sense of direction is totally just not there, but for the most important episode of my life, it finally kicked in. I recognized streets I was walking down from the last time Kim and her friends took me to Beecher’s, and I cheese pilgrimaged. Beautiful.
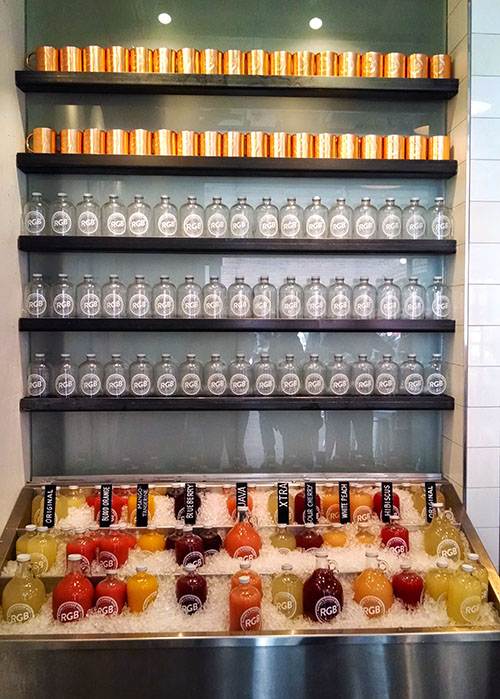
99 bottles of ginger beer on the wall?
And no cheese excursion is complete without a fizzy, spicy, tangy ginger beer to go with it. Rachel’s Ginger Beer was a recommendation from my friend Lori. They also have cocktails, which I heartily approve of.
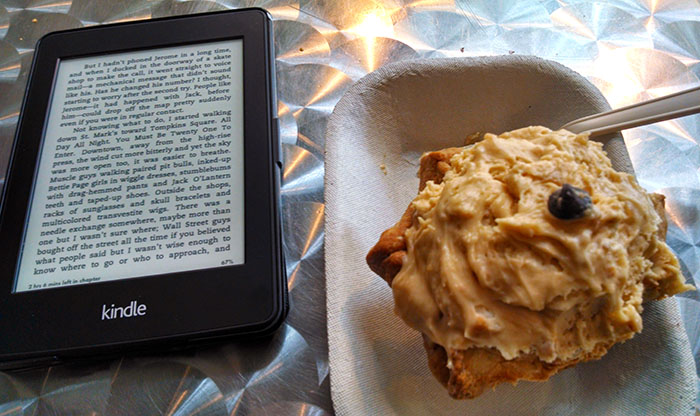
Work break.
Eventually, I went to the Google office in Fremont. I am somewhat ashamed to say I actually then ate a full lunch, there. For my afternoon break, I walked around the area, visited the Fremont troll, and ate an enormous peanut butter pie all by myself while reading The Goldfinch. Sometimes life is pretty awesome.
Met with Kim for dinner, where we ate these incredibly addicting fried fake meatballs, which were obviously everything I’d ever dreamed of. And then, the best salted caramel ice cream of my life, which is really saying something, at Molly Moon’s.
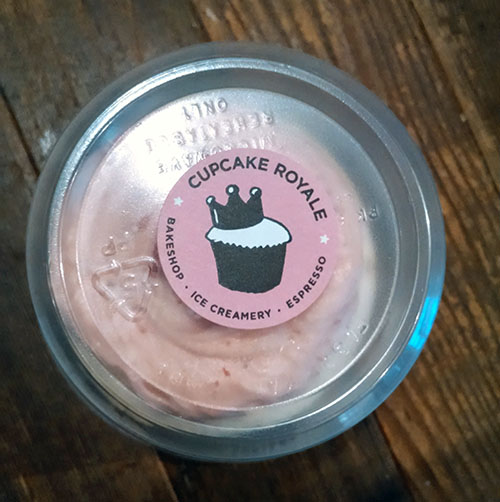
Cupcake for later.
I promise I did actually attend the conference I went to Seattle for. The entire time, this little to-go cupcake was waiting in my backpack for my plane ride home.
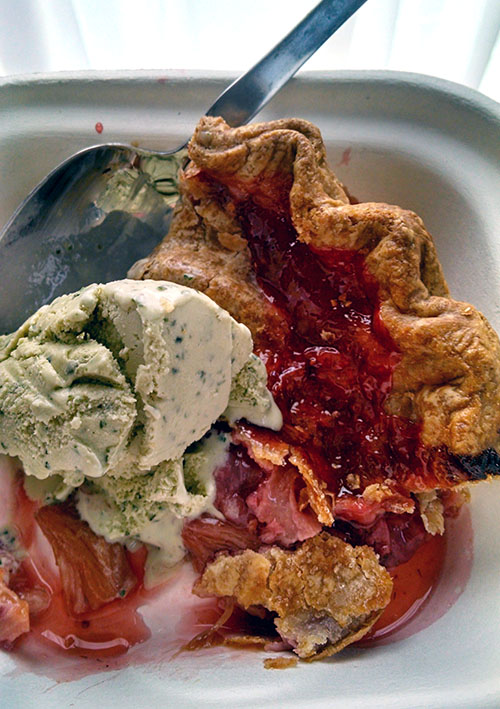
Basil ice cream on some strawberry rhubarb pie from Mission Pie
It’s a scorching 55 degrees in San Francisco right now, so, let’s make some ice cream, yeah?
It took me a while to get the hang of making ice cream, but once I figured it out (the trick was using way more ice cream salt), it’s been very entertaining. While San Francisco’s ice cream scene is pretty hot already (thanks, NYT), one can never have too many ice cream flavors.
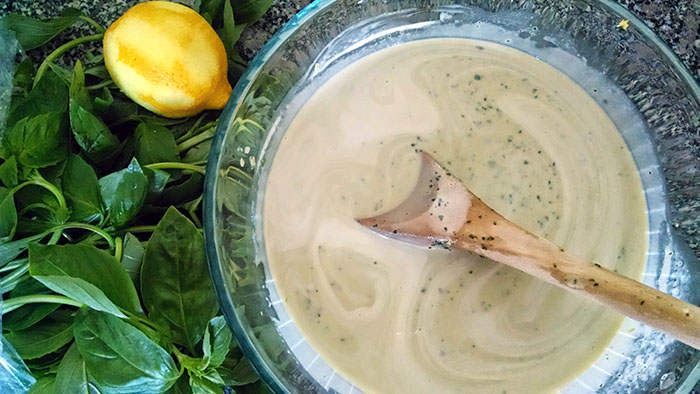
So, basil ice cream. I had fully intended to make coconut ice cream, but then the stand at the farmers’ market had $2 enormous bunches of basil, and I couldn’t resist. Even after a big batch of pesto and several meals, there was still a ton, so, basil ice cream. David recommends Italian basil, which was what we happened to have. (Though, I think Thai would be pretty awesome, too.) It makes a very plant-y, very lightly spicy ice cream that’s both rich and somehow refreshing. And it’s very light green by the end of the process, which I liked.
David Lebovitz’s Basil Ice Cream From The Perfect Scoop
1 cup packed basil leaves
3/4 cup sugar
2 cups heavy cream
1 cup whole milk
pinch of salt
4 large egg yolks
1 lemon
Using a food processor, grind the basil leaves, sugar, and 1 cup of cream until the basil leaves are ground as finely as possible. The mixture will be very faintly green (kind of gray) and just short of butter-consistency. Pour about half of this mixture into a large bowl with the remaining 1 cup of cream and set aside.
Warm the other half of the basil mixture in a saucepan with the cup of whole milk. Separately, whisk together the 4 egg yolks. Once the milk is hot and steaming but not boiling, temper the egg yolks by adding a little bit of milk into the egg yolks while whisking constantly. Repeat this with a little more milk each time until the egg yolk mixture is warm. Then, add the egg yolk mixture into the saucepan with the rest of the milk.
Continue to heat the custard in the saucepan, stirring slowly but constantly. Make sure to scrape the bottom of the pan as best you can while doing so. Heat until the custard reads 170 degrees F on an instant-read thermometer (a normal thermometer is too slow, and you might overdo it while waiting for its measurement). If you don’t have an instant-read thermometer, you’ll know the custard is done when the texture thickens. The custard will coat the back of a wooden spoon, and you’ll be able to leave a definite trail if you run your finger along the spoon that the custard won’t encroach on. I find it’s better to air on the side of slightly less done, as the custard will continue to cook in the hot pan after you turn the heat off.
Once the custard is done, quickly pour it into the bowl with the cream. Stir to cool. Legitimate ice cream makers will tell you to cool it in an ice bath at this point, but I usually just put it next to an open window (remember, 55 degrees here) until it’s room temperature. Zest the lemon right into the custard and stir. Then, chill in the refrigerator overnight.
Follow your ice cream maker’s instructions to make ice cream. I have an electric one that takes ice / ice cream salt, so I don’t need to freeze the machine core in advance… but I do need to make lots of ice.
Fresh out of the ice cream maker, it’s kind of like soft serve. I say enjoy a little! The rest can go in a container in the freezer to harden to normal ice cream consistency.
When my roommates are out of town and I’m home alone, things seem to go one of two ways: either I get super intense and try labor-intensive cooking experiments & aggressively socialize, or, I watch television for hours on end and eat exclusively instant ramen and leftovers. Neither are great. I shouldn’t be trusted on my own.
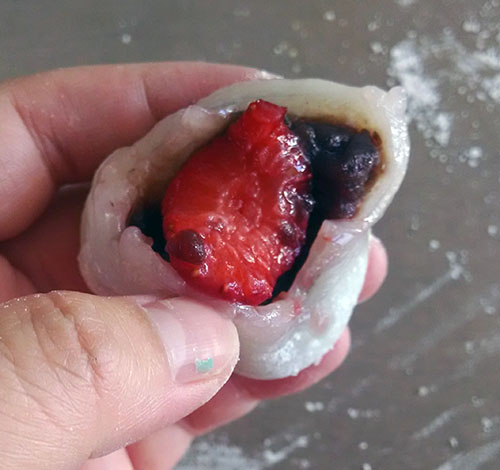
One recent weekend I had the apartment to myself, I went the former route and made these strawberry-filled mochi, and also like 150 dumplings that I froze and am still making my way through. I brought the mochi to a party. They were gone instantly… unlike the dumplings.
Mochi! Filled with ice cream, plain, or with sweet bean paste, it’s a favorite of mine that is surprisingly easy (if messy) to make in the microwave. Making large quantities of filled mochi can be pretty tedious, since it’s a feat best done in small batches, but it’s very satisfying. Whenever I do it, our entire kitchen is covered in corn starch handprints for the rest of the day.
10-15 small strawberries
1 or 1-1/2 cup anko (sweetened azuki bean paste)
2 batches of the following:
100 grams (~ 1 cup, but I actually weighed it this time) glutinous rice flour
1/4 cup sugar
2/3 cup water
cornstarch (at least a cup)
Cling wrap
Kitchen twine
Trim the leaves off the strawberries, wash (if you want), and let dry thoroughly. Then, coat each strawberry with a thin layer of the anko. It’ll probably get pretty messy, and that’s okay. Chill the anko-covered strawberries in the freezer while you prepare the mochi.
Sprinkle cornstarch on a cutting board. Be generous, because mochi is very sticky.
In a large, microwave-safe bowl, mix the rice flour, sugar, and water well. Microwave for 2 minutes, then remove the bowl and mix. I used a silicon spatula to minimize stickiness. It’ll probably not be done yet, so return to the microwave and for a minute. Remove and stir. Continue until the dough inflates while in the microwave — one or two more cycles should do it.
Grab the strawberries from your freezer and put them near your cutting board.
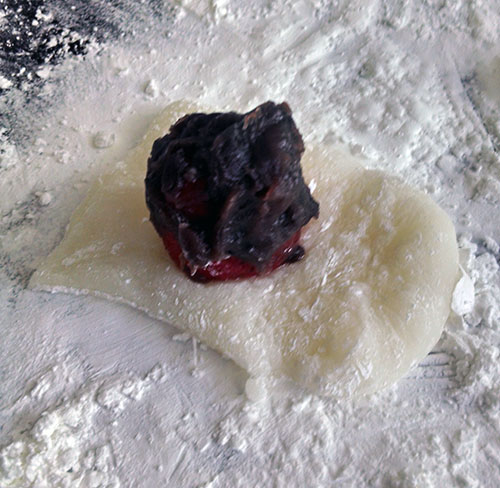
Scrape the dough off the bowl as best you can and dump it onto the cornstarch-covered cutting board. Sprinkle a little more cornstarch on top and begin to work the dough into a flat-ish surface. It will be hot, so work carefully but quickly.
Burning hot sticky rice and cold strawberries. Also, corn starch everywhere.
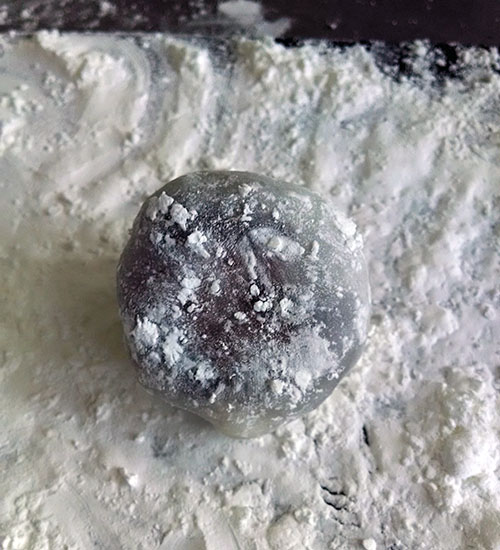
Cut the dough into about 6 or so pieces (as even as possible) and stick a strawberry in the middle. Wrap the edges around and press to seal. The dough is quite sticky, so don’t worry too much about form, since it will all sort of even out once it’s stuck together. Finish remaining pieces.
Wrap each piece in a small amount of cling wrap tied off with some kitchen twine for the best hope for lasting as long as possible. They’re also adorable.
Make another batch of mochi in the microwave to finish off remaining strawberries. I had to do 2 batches because the mochi stops being sticky once it’s cool, and I don’t work fast enough to do 10-15 at a time.
Filled mochi are very satisfying, as lumps sort of fix themselves by the end.